Custom block + custom post types. Modern WordPress meets classic. ❤️
The example I’m going to run with for this tutorial is based on a game review site. The specific block is one that lets you drop the latest reviews in a tile/grid format onto the page which each tile linking off to a review. Looks like this:

This custom block, other than looking pretty, does a few cool things:
- Loops through a custom post type (game reviews)
- Lets you choose the max number of posts to display
- Lets you choose if you want to show the latest reviews or to show a review from a certain category
The great part is that it’s really not that difficult. Through Genesis Custom Blocks we’re able to leverage WP_Query in our block template files.
Let’s do it!
Step 1 – Setup
First of all, I have a fresh WordPress install, running on Local, with a child theme for the TwentyTwenty theme active. TwentyTwenty is the theme of choice for this one as it lets me easily set-up that dark-mode vibe. I have Genesis Custom Blocks Pro installed and CPT UI for creating the Game Review custom post type.
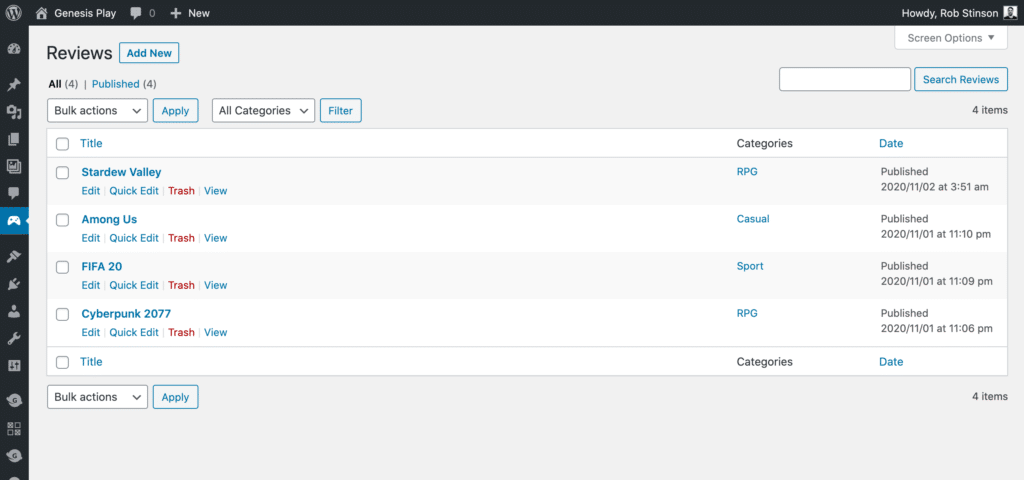
I created 4 quick game reviews as well. When creating these I added a bunch of game genre categories. RPG, Adventure, Sport, etc.
Some simple colour settings for the theme in the Customizer help me get the dark-mode vibe going.
Every WordPress site is different, so the set-up here is as simple as possible.
Step 2 – The Custom Block Builder
Now that we have the content we’ll be interacting with sorted out, let’s begin building our custom block.
With Genesis Custom Blocks active, in the WordPress admin go to Custom Blocks>New Block.
Few basic block settings:
- Title: Game Reviews
- slug:
game-reviews - Icon: The game controller one
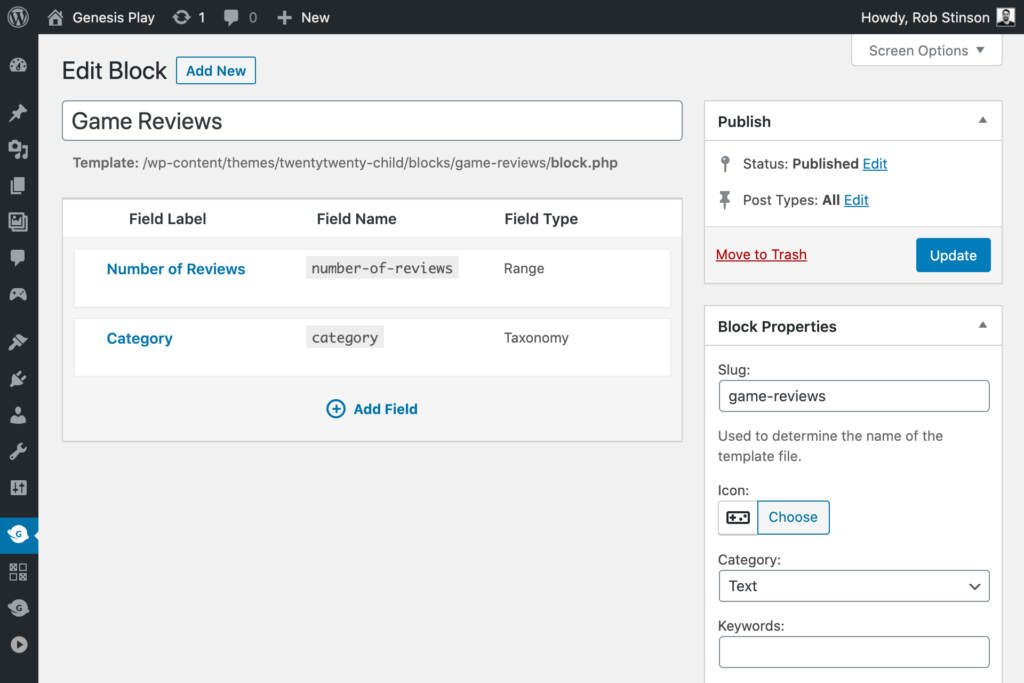
We’ll also give our block a couple of fields. This block relies on the WordPress function WP_Query so the fields we are adding relate to arguments we will pass to the query.
We will add:
- A range field type for the number of reviews we want to show in our grid. Min is set to 1. Max is set to 12. Default is set to 4.
- A Taxonomy field (Pro field) for when the user wants to dictate which genre (categoy) of games should be displayed.
Looks like this in the block builder:
With that, we hit publish.
Step 3 – The block templates
We’ve registered the block, configured the main settings, and added a couple of fields. Now we build our template.
If you’ve not built a block with Genesis Custom Blocks before, the templating engine is where the magic really happens. Effectively, it massively simplifies the code you need to write.
If you’re comfortable with simple HTML and CSS you have all the skills needed to build custom blocks.
The plugin gives you a handful of PHP functions that you can use to interact with the fields you add to your blocks. Also, because it’s PHP, we can leverage a lot of standard WordPress dev stuff. E.g. WP_Query.
Moving on. In our theme files (child theme for TwentyTwenty) we are going to add a couple of folders and files. Docs here for all the broader details on this. We add:
twentytwenty-child/
    blocks/
        game-reviews/
            block.php
            block.css
The blocks folder is where you will hold all your block files, for this one and any other you could add. The game-reviews folder is for this specific block and must match the slug we defined when adding our block in the WordPress admin. The plugin auto-magically recognises this folder and pairs it with the block. The block.php and block.css files are where we will do our templating.
First, our PHP file. This is where we will work with WP_Query. Our code looks like:
<?php
//Variables
$number_of_posts = block_value( 'number-of-reviews' );
$category = block_value( 'category' );

// The Query
$the_query = new WP_Query(
    array(
        'post_type' => 'review',
        'posts_per_page' => $number_of_posts,
        'category_name' => $category->name
        )
);

// The Loop
if ($the_query->have_posts()) {
    echo '<div class="gcb-game-reviews alignwide">';
    while ($the_query->have_posts()) {
        $the_query->the_post();

        // Variables
        $categories = get_the_category();
        $first_cat = $categories[0]->name;
        $first_cat_url = get_category_link( $categories[0]->term_id );
        ?>

        <div class="gcb-game-reviews__tile">
            <div class="gcb-game-reviews__image" style="background-image: url('<?php echo get_the_post_thumbnail_url(); ?>');">
                <a class="gcb-game-reviews__cat" href="<?php echo $first_cat_url ?>"><?php echo $first_cat; ?></a>
            </div>
            <div class="gcb-game-reviews__tile-content">
                <h4><?php the_title(); ?></h4>
                <?php the_excerpt(); ?>
                <div class="gcb-game-reviews__review-author">
                    <img class="gcb-game-reviews__avatar" src="<?php echo get_avatar_url( get_the_author_meta( 'ID' )); ?>" alt="">
                    <span><?php the_author(); ?></span>
                </div>
                <a class="gcb-game-reviews__button" href="<?php the_permalink(); ?>">Read Review</a>
            </div>
        </div>
        <?php
    }
    echo '</div>';
} else {
    // no posts found
}
/* Restore original Post Data */
wp_reset_postdata();
?>
So there are a few things going on here:
- We create a couple of variables to store the values from our 2 block fields.
number-of-reviewsandcategory - We fetch the values for these 2 fields by using the
block_value()function. This is one of the functions the plugin gives us. - We use
WP_Queryto loop through our custom post typereview - We pass in a few arguments using our 2 variables
- Bunch of HTML for our structure
- Few other WordPress functions for displaying the post (review) title, author, permalink, and feature image.
- Few CSS classes, like
gcb-game-reviewsandgcb-game-reviews__review-authorwhich we use for styling
Let’s just pause for a minute and see what we have. We can go back to our WordPress admin, create a new post and look for our custom block:
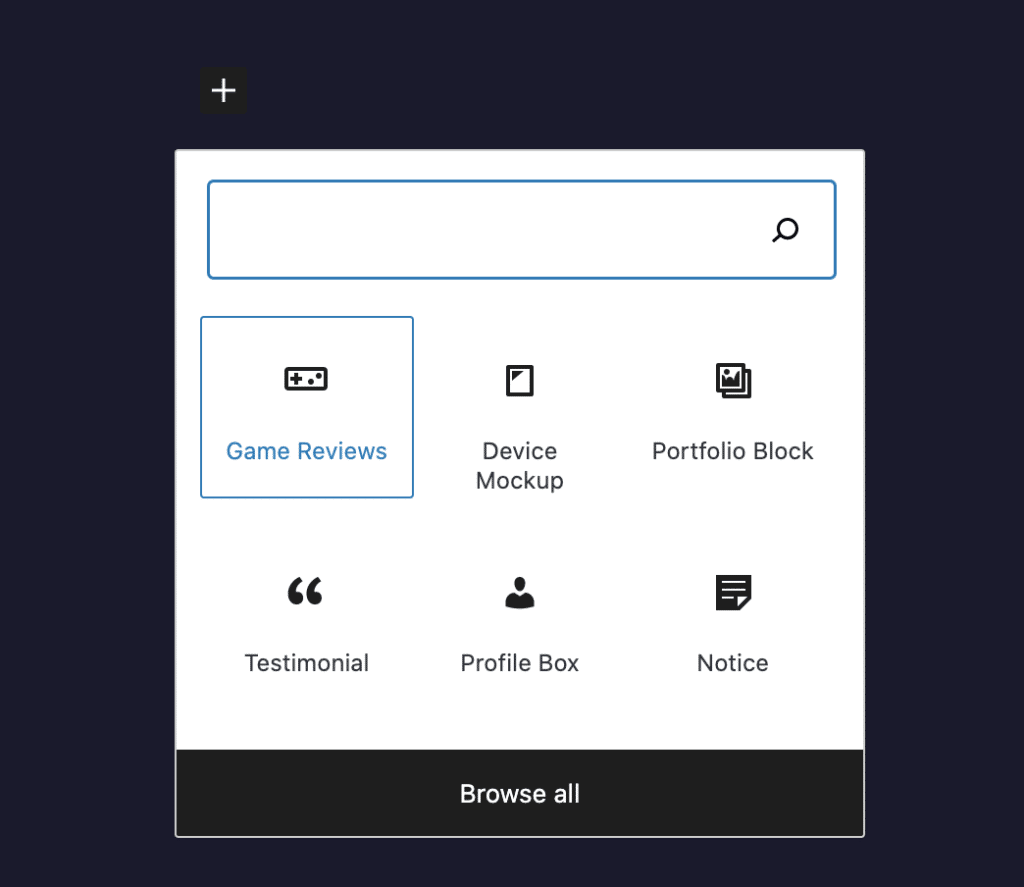
Nice, we can see it in the editor. When we add the block we see:
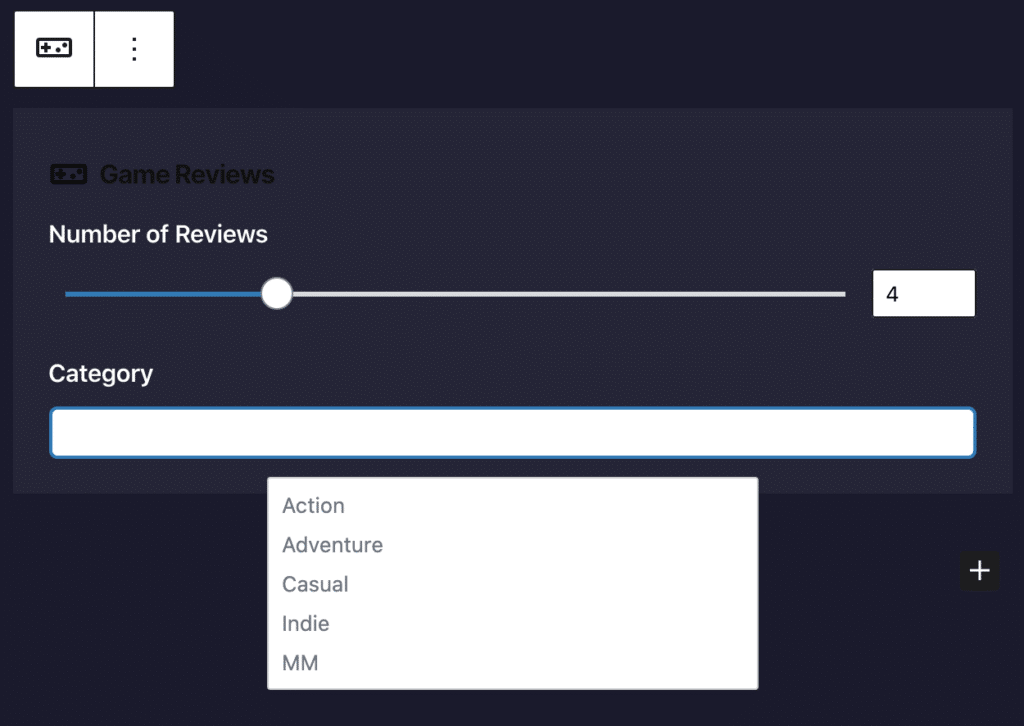
Selecting the block in the editor show us the block form with our 2 fields. Admitedly, we have some color contrast issues because the editor is using our darkmode. We can fix this, but is beyond the scope of the tutorial.
If we leave the fields as is, and click away from the form, the block previews as:

Ok. Not Pretty (yet)! But we can see our WP_Query loop is working. It’s pulling through all the bits and pieces of data that we want from the reviews.
Now we can make it look nice. Our block.css is where we do our styling. A really really cool thing to know about Genesis Custom Blocks is that any CSS in the block template files is only loaded (conditionally) on the frontend if the block is added to the page. E.g. the CSS we have for this block will only get loaded on the frontend if we add this block to the page. For those that care about performance (everyone!), this is a big deal!
2 things about the CSS below:
- Everyone has their own preferences when writing CSS. This is just mine.
- This styling is partially subjective to the theme I’m using.
Considering these 2 points, have a look and play with the below, but be mindful that your own CSS will likely differ.
.gcb-game-reviews {
    display: flex;
    flex-wrap: wrap;
}

.gcb-game-reviews__tile {
    display: flex;
    flex-grow: 1;
    width: 500px;
    border-radius: 20px;
    overflow: hidden;
    background-color: #21213a;
    padding: 10px;
    margin: 10px;
    box-shadow: 0 20px 25px -5px rgba(0, 0, 0, 0.05), 0 10px 10px -5px rgba(0, 0, 0, 0.04);
}

.gcb-game-reviews__image {
    display: flex;
    flex-shrink: 0;
    align-items: flex-start;
    background-size: cover;
    min-height: 200px;
    width: 260px;
    border-radius: 14px;
}

.gcb-game-reviews__tile-content {
    display: flex;
    align-items: flex-start;
    flex-direction: column;
    /* color: #fff; */
    margin-left: 20px;
    padding: 10px 0;
}

.gcb-game-reviews__tile-content h4 {
    font-size: 24px;
    font-weight: 500;
    margin: 0 0 0.5em;
}

.gcb-game-reviews__tile-content p {
    font-size: 14px;
    font-family: sans-serif;
}

.gcb-game-reviews__cat {
    display: flex;
    background-color: #0f3460;
    color: #fff;
    font-size: 10px;
    text-transform: uppercase;
    font-weight: 600;
    font-family: sans-serif;
    letter-spacing: 1px;
    padding: 2px 10px;
    border-radius: 20px;
    margin-left: 10px;
    margin-top: 10px;
    opacity: 0.90;
    text-decoration: none;
}

.gcb-game-reviews__cat:hover {
    opacity: 1;
}

.gcb-game-reviews__button {
    display: flex;
    background-color: #e94560;
    color: #fff1ec;
    font-size: 10px;
    text-transform: uppercase;
    font-weight: 600;
    letter-spacing: 1px;
    padding: 6px 12px;
    border-radius: 6px;
    margin-top: auto;
    font-family: sans-serif;
    text-decoration: none;
}

.gcb-game-reviews__button:hover {
    background-color: #be394f;
    color: #fff1ec;
}

.gcb-game-reviews__review-author {
    display: flex;
    align-items: center;
    margin-bottom: 10px;
}

.gcb-game-reviews__review-author span {
    font-size: 13px;
    font-family: sans-serif;
    margin-left: 8px;
    line-height: 1;
    opacity: 0.75;
}

.gcb-game-reviews__avatar {
    flex-shrink: 0;
    height: 20px;
    width: 20px;
    border-radius: 50%;
    border: 1px solid #bbb2eb;
}
With that in our block.css file, we can check our editor preview again:
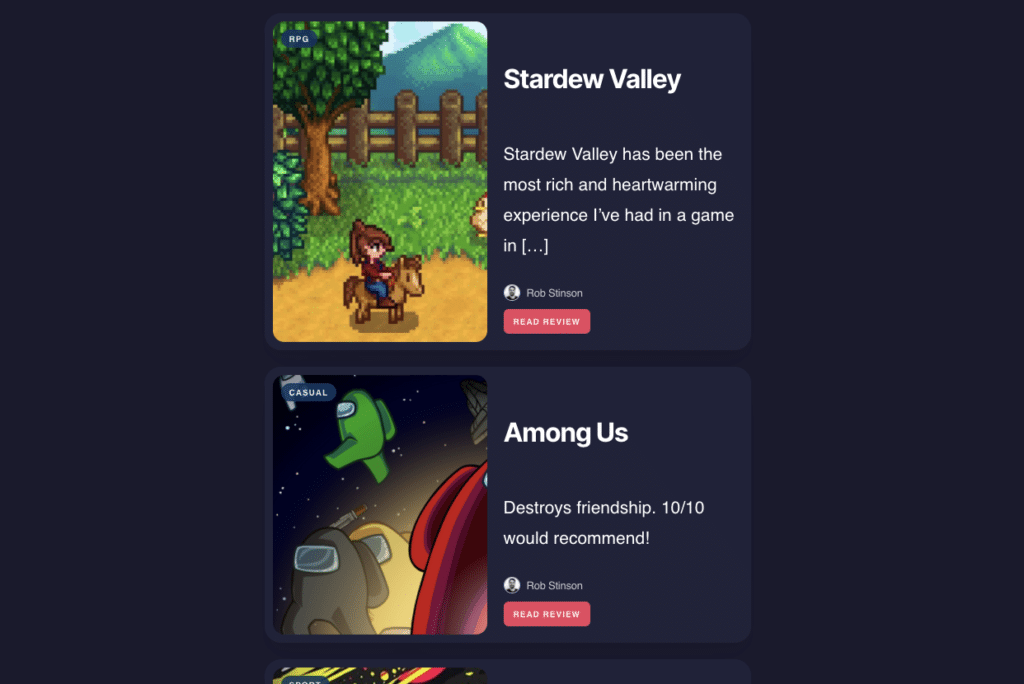
And when we preview the post on the frontend we see:

That’s it! It responsively switches to a single column on smaller screens. All the links work, and when we change the number of reviews we want to show and the post category (game genre) via our 2 block fields, the output is exactly as we expect!
Now, if we wanted to, there are a few things we could do to make this even better :
- Make the editor preview the wider width/2 columns to match what is on the frontend
- Add a custom field for the review CPT that lets us add 1-5 star reviews for the games. We could then show these on the tiles
- Add a user field so we can choose to display reviews from a specific author
- Add a toggle field to the block and appropriate conditional styling that lets us change the orientation of the tiles (image on top; text etc on bottom)
All those for another day though. I hope what I’ve covered here gives you a good idea of the possibilities with custom blocks, particularly through Genesis. Building custom blocks that look amazing, are performant, and do exactly what you want isn’t nearly as hard as many think.
Give it a go yourself and let me know what you create! If you’d like to go further with building custom blocks, the best thing I can encourage you to do is join the Genesis Slack community. There are hundreds of other WordPress developers there, sharing, learning, and teaching together.
Genesis Custom Blocks is a free plugin on WordPress.org. With a Genesis Pro subscription you unlock a few powerful advanced features as well as 24/7 support.
Happy block building!
